

The mute button on a Lenovo ThinkPad laptop is an essential feature that allows users to quickly and easily silence their device’s audio output. However, when this button becomes stuck, it can be incredibly frustrating and impact productivity. The good news is that there are several available fixes. This problem has been experienced by many ThinkPad users at some point or another.
Table of Contents
In this article, we will provide helpful tips and solutions for fixing a stuck mute button on a Lenovo ThinkPad laptop.
Common causes of Lenovo ThinkPad mute button stuck issue
There are several common reasons why the mute button on a Lenovo ThinkPad laptop may become stuck. Specks of Dirt that have formed around the button, making it difficult to push, is one of the most prevalent culprits. This can happen over time, especially if the laptop is used in dusty or dirty environments.
Another possible cause is a software glitch. Sometimes, the audio driver software on the laptop can become corrupted, causing the mute button to become stuck. Lastly, a hardware issue with the mute button or the audio system of the laptop can also cause the button to get stuck. This can happen if the button or the underlying hardware components are damaged or worn out due to regular use.
Identifying the root cause of the problem is crucial in determining the best solution for fixing the stuck mute button.
Solution 1: Clean the mute button
Here is the step-by-step guide for cleaning the mute button on a Lenovo ThinkPad laptop:
- Turn off and disconnect your ThinkPad notebook from the power source.
- Locate the mute button on your laptop.
- The mute button is normally situated above the keyboard, on the top row of keys, on most ThinkPad models.
- Take a soft-bristled brush or a clean, dry cloth and gently brush or wipe around the mute button to remove any visible dirt or debris.
- If the dirt or debris is more stubborn, use a can of compressed air to blow air around the button to dislodge any particles that may be stuck inside.
- After cleaning, press the mute button a few times to ensure it’s working smoothly.
- Turn on your laptop and test the mute button to ensure it’s working correctly.
If the mute button is still stuck after cleaning, try the other solutions outlined in this article to troubleshoot the issue.
Solution 2: Update the audio driver

A software glitch in the audio driver can cause the mute button on a Lenovo ThinkPad laptop to become stuck. The audio driver is responsible for managing the sound output on the laptop, including the mute button function. If the audio driver software becomes corrupted or outdated, it can interfere with the mute button’s proper operation, causing it to become stuck.
Updating the audio driver on a Lenovo ThinkPad laptop can resolve this issue. An updated driver will ensure that the audio driver software is functioning correctly and can detect and respond to the mute button input as intended.
Follow these steps to update the audio driver on a Lenovo ThinkPad laptop:
- Go to the Lenovo support website and search for your specific ThinkPad model. The Lenovo Vantage app, which comes pre-installed on most ThinkPad notebooks, may also be used.
- On the product support page for your ThinkPad model, look for the section titled “Drivers and Software.”
- Find the audio driver for your ThinkPad model and download the latest version.
- Double-click the downloaded file to launch the audio driver installation when the download is finished.
- After updating the audio driver, test the mute button to confirm that it’s working correctly.
- Restart your ThinkPad laptop to ensure the changes take effect.
After updating the audio driver, test the mute button to confirm that it’s working correctly. Try one of the options listed in this article if the problem remains.
Solution 3: Reset the BIOS
The Basic Input/Output System simply called (BIOS) is an important part of any computer system, such as Lenovo ThinkPad notebooks. It’s responsible for initializing the hardware components of the laptop when it’s powered on, and any issues with the BIOS can cause hardware components to malfunction, including the mute button.
Resetting the BIOS can sometimes resolve issues with hardware components, including the mute button, on a Lenovo ThinkPad laptop. Resetting the BIOS will restore the BIOS settings to their default values and can resolve any configuration issues that may be causing the mute button to become stuck.
These are the steps to reset the BIOS on your Lenovo ThinkPad laptop:
- shut-down the laptop and unplug it from the power source.
- Press the power button to turn on the laptop, and immediately press the F1 key repeatedly until the BIOS setup utility screen appears.
- Use the arrow keys to navigate to the “Restart” or “Exit” menu and select the “Load Setup Defaults” or “Reset to Default” option.
- Confirm the action by selecting “Yes” or “OK” and pressing the Enter key.
- Navigate to the “Exit” menu and select the “Exit Saving Changes” option.
- Confirm the action by selecting “Yes” or “OK” and pressing the Enter key.
- Let the laptop restart and start up normally.
- Test the mute button to ensure it’s working correctly.
You may need to attempt one of the other methods listed in this article or contact Lenovo support if the mute button is still stuck after resetting the BIOS.
Solution 4: Replace the mute button
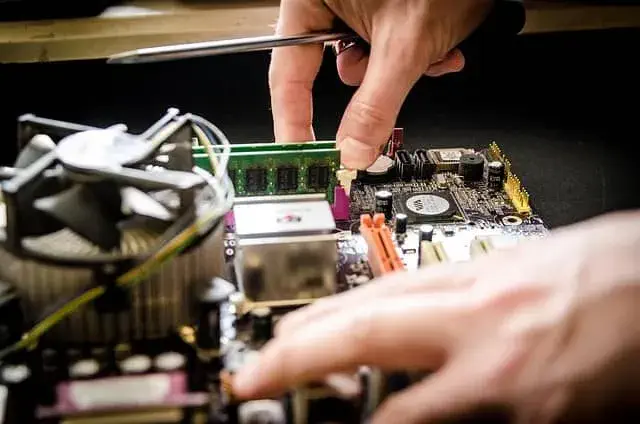
If none of the previous solutions work, it may be necessary to replace the mute button on your laptop. The mute button is a small hardware component, and if it’s worn out or damaged, it can become stuck, making it difficult or impossible to use.
To replace the mute button on your Lenovo ThinkPad laptop, follow these instructions:
- Purchase a replacement mute button that’s compatible with your specific ThinkPad model. You can order the part from Lenovo or from third-party retailers.
- Unplug your laptop from any power source and Shut down it.
- To gently remove the screws holding the keyboard in place, use a little screwdriver. According to your ThinkPad model, the placement of the screws may differ, therefore consult the user manual for instructions.
- Avoid damaging any of the ribbon wires that link the keyboard to the motherboard by carefully lifting and setting the keyboard to one side.
- Locate the mute button on the laptop and gently lift it up to remove it from the laptop.
- Carefully insert the replacement mute button into the same slot where the old mute button was located.
- Reposition the keyboard, making sure that the ribbon wires are all firmly attached to the motherboard.
- Reinsert the screws that secure the keyboard in place.
- Turn on your ThinkPad laptop and test the mute button to ensure it’s working correctly.
If you’re unsure about how to replace the mute button or don’t feel confident doing it yourself, seek assistance from a professional computer repair service or Lenovo support.
Conclusion
In conclusion, a stuck mute button on a Lenovo ThinkPad laptop can be frustrating, but there are several solutions available to fix the issue. First, cleaning the mute button is a straightforward solution to remove dirt and debris that can cause the button to stick. Updating the audio driver is another solution to resolve any software glitches that may be causing the issue. Resetting the BIOS can also help to resolve issues with hardware components, including the mute button. If none of these solutions work, replacing the mute button may be necessary.
Lenovo ThinkPad blinking power light: How to fix this issue?
Lap Launch
Fixing the Lenovo ThinkPad mute button stuck issue is important because it can affect the functionality of the laptop’s sound system and make it difficult to mute or unmute audio during important calls or meetings.
Overall, with the solutions and tips provided in this article, you can easily fix the Lenovo ThinkPad mute button stuck issue and maintain the functionality of your laptop’s sound system.
FAQs
What causes the mute button on a Lenovo ThinkPad laptop to become stuck?
The mute button can become stuck due to dirt or debris, software glitches, or hardware issues.
How can I clean the mute button on my ThinkPad laptop?
You can clean the mute button on your ThinkPad laptop by using a small brush or compressed air to remove any dirt or debris that may be causing it to stick.
What should I do if updating the audio driver doesn’t fix the stuck mute button issue?
If updating the audio driver doesn’t fix the issue, you can try resetting the BIOS or replacing the mute button.
Can I replace the mute button on my Lenovo ThinkPad laptop myself?
Yes, you can replace the mute button on your ThinkPad laptop yourself, but it’s important to follow the proper instructions and handle the laptop and its components with care.
How can I prevent the mute button from becoming stuck again in the future?
You can prevent the mute button from becoming stuck in the future by keeping your laptop clean, performing regular software updates, and handling your laptop with care to avoid physical damage to the mute button or other hardware components.